Exercise 1
This guide will allow you to put the learning from lessons 1 - 3 into practice. It will walk you through the process of:
- Forking the site repository
- Cloning it locally
- Make changes to a local branch
- Committing these changes
- Pushing them to your remote fork
- Submitting your first Pull Request
While some repository names etc may be different in the images, the layouts etc should still be accurate.
Setup
-
First, go to The project repository.
-
Look for the “fork” button in the top right section of the view. See the below image:
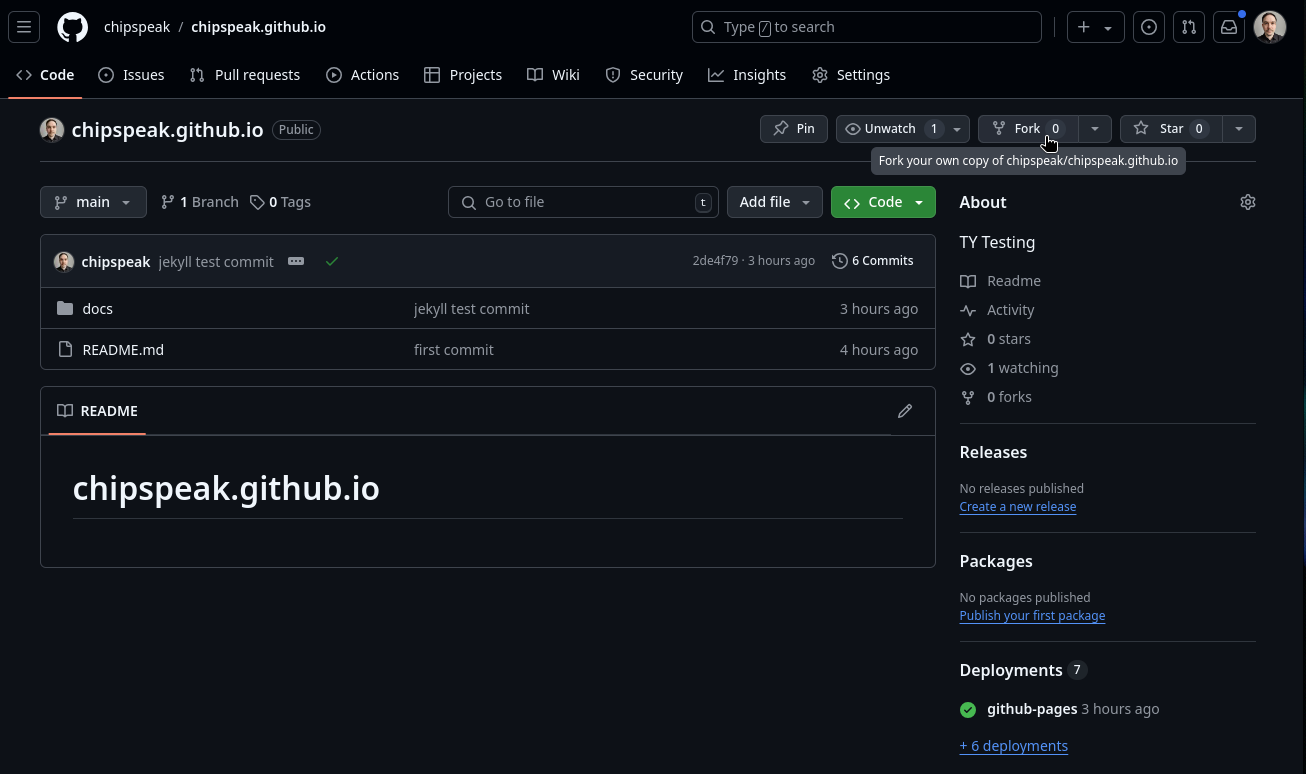
-
Click this button then select an owner for your fork (your GitHub username should appear here) then click “create fork”.
-
Once you’ve created your fork, GitHub should take you directly to it. This should be identical to the project repo for now.
-
Click the green “code” button and copy the HTTPS address.
- Within your terminal, navigate to whichever directory you store repositories in and enter:
git clone <THE_URL_YOU_COPIED> - Once this has completed, navigate to the newly created directory by entering:
cd <NAME_OF_YOUR_DIR> - Once you’re in your repo’s directory, let’s check that our remote origin is set up correctly. Enter the following:
git remote show origin - The “Fetch-URL” and “Push URL” should be in the format:
Fetch URL: https://github.com/<YOUR_USERNAME>/rh-outreach-blog.github.io.git Push URL: https://github.com/<YOUR_USERNAME>/rh-outreach-blog.github.io.git - If they aren’t in this format you can update them using the following command:
git remote set-url <YOUR_REPO_URL> - In the IDE of your choice, open this project directory. If using VS code you can do this by navigating to the directory and entering:
code .
Making Changes
-
A good practice when working on your code is to sync your fork regularly. Clicking the button will tell you if your fork is after falling behind the main repo. If so, click “update branch” to bring it up to date with the main repo. See below image:
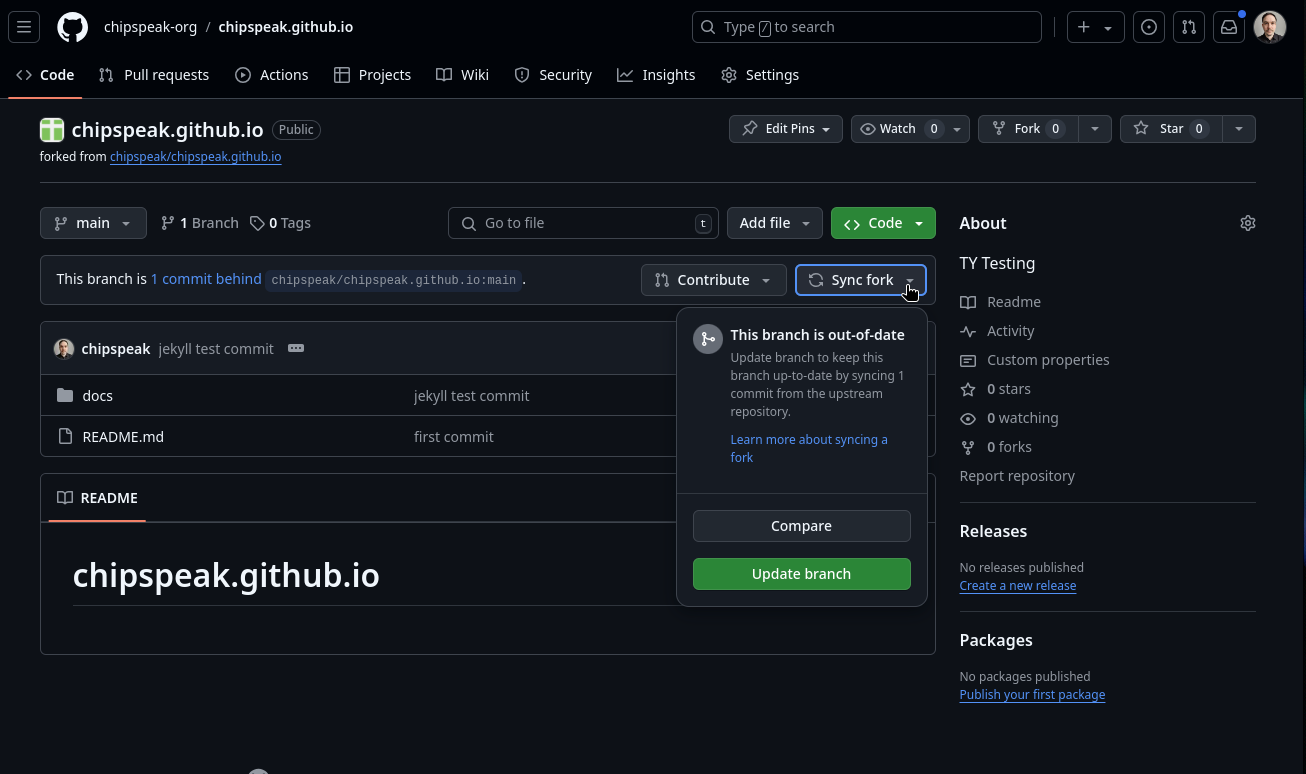
- Once you’ve synced your fork, you can pull any changes by using the command:
git pull # or if that doesn't work git pull origin main -
Now let’s add a new blog page. To do this, navigate to docs/_posts within the project repo.
- Let’s create a branch for the changes we intend to make to the upsteam repo. Do this by entering:
git checkout -b <YOUR_BRANCH_NAME> # -b flag will create the branch prior to checkout -
Within this directory, create a new file with the name format: **YYYY-MM-D-
.markdown**. Note that it must be a current or past date. -
Next open the sample file 2024-11-4-sample_blog.markdown, copy its contents and paste them into your new file.
- Update the section at the start of the file as seen below:
--- layout: post # leave as is title: "<NEW_BLOG_TITLE>" # add whatever title you'd like date: <YYYY-MM-D> <HH:MM:SS> +0100 # update the date and time categories: jekyll update # leave as is --- -
Make whatever changes you like to the repo and save them within your IDE.
- Now lets add these changes to stage. In your integrated terminal enter:
git add . - Now that we’ve staged the changes, we can commit them:
git commit -m "<YOUR_COMMIT_MESSAGE>" - You can check if your commit was successful by entering:
git log - Once you’ve verified the presence of your commit, you can push it to your origin by entering:
git push origin <YOUR_BRANCH_NAME> # this will create a remote branch of the same name and push it
Opening a PR(Pull Request)
-
The changes you’ve made should now be present in your remote branch. Check this by navigating to your repository on GitHub and click the branch button seen in the below screenshot.

-
Verify that your remote branch contains the most recent commit.
- In order to submit a PR we need to ensure our upsteam origin is set. Enter the following:
git remote add upstream https://github.com/rh-outreach-blog/rh-outreach-blog.github.io.git - Now you can enter the following to create a PR:
gh pr create --base main --head <YOUR_USERNAME>:<BRANCH_NAME> --repo rh-outreach-blog/rh-outreach-blog.github.io --title "Your PR Title" --body "Your PR Description" - Once your PR has been created you can participate in the review process. Whenever you want to act on a suggestions, simply make the change in your local branch and then commit and push this to your remote branch via:
git push origin <YOUR_BRANCH_NAME> # this will update the code the reviewer can observe in the PR - Once the review process is complete you are able to merge to the main branch via the web UI. However, it’s good practice to tidy up our commit history via rebasing. You can hold off on merging until we cover this in exercise 2.